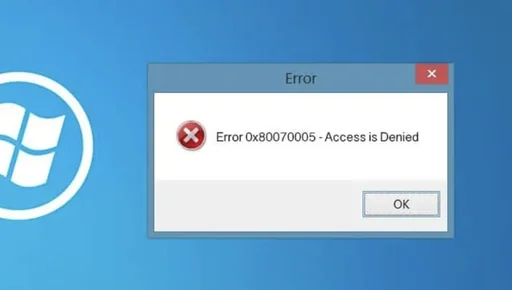
Whenever an export operation inside Hyper V grinds to a halt with an access denied code, most forum threads will immediately tell you to do the easy thing. People usually tell you to run Hyper V Manager as Administrator, take ownership of the root folder, or give full control permissions to the Everyone group. I have tried all those shortcuts in my own lab over the years, and they almost always end in frustration. They might seem like a quick patch, but they rarely solve the underlying issue and they often leave your storage permissions in an absolute mess.
Personally, I have found that taking five minutes to fix the problem properly pays off tenfold. It feels slightly more technical up front than clicking around in file explorer, but granting proper rights directly to the virtual machine security principal and inspecting your disk chains gets the job done cleanly. It keeps your hypervisor happy, preserves your folder hygiene, and ensures your exports actually complete without breaking anything.
Understanding the Hidden Virtual Identity
The biggest trap with the classic 0x80070005 access denied error is assuming your administrator account is the one failing to read the disk. In reality, Windows does not export the virtual machine under your user profile. The hypervisor delegates the heavy lifting to a specialized background service identity tied to the unique identifier of that specific guest machine. If that virtual identity cannot read or modify the source storage, the process crashes out immediately, even if your personal account has unrestricted system access.
Once you know this detail, fixing permissions becomes straightforward. You simply need to teach Windows to recognize that virtual security identity and grant it the exact rights it requires.
First, open Hyper V Manager and locate your target guest. Right click the machine, check its properties or name settings, and grab its unique ID string, which looks like a long hexadecimal sequence. Once you have that string, fire up an elevated command prompt.
The command to restore peace uses the icacls utility:
icacls “D:\Hyper-V\Virtual Machines\YOUR-VM-ID” /grant “NT VIRTUAL MACHINE\YOUR-VM-ID”:(F) /T
Make sure you replace the folder path and the ID placeholder with your actual storage directory and machine ID. If you happen to store your virtual hard disks in a completely separate folder on another drive, run the exact same command against that storage folder too. This gives the machine identity full control across the entire file tree without opening security holes for external users.
Having a clean permission setup like this keeps your everyday homelab projects running smoothly across their entire lifecycle. Over the years, I have relied on this exact fix to export:
- A small Alpine Linux pi-hole instance that I frequently clone across different test hosts.
- A Home Assistant server carrying years of custom automations and device configurations.
- A local WordPress testing box where I draft themes before pushing them to live servers.
- A personal PostgreSQL database node that I need to back up cleanly before major engine upgrades.
- A lightweight development workspace packed with compilers, toolchains, and custom scripts.
Once the permissions are aligned to the virtual identity, moving these machines around between storage pools or archiving them offsite works every single time.
Untangling the Checkpoint Chain Before Exporting
If permissions look solid and you still face export failures, your next stop should always be the checkpoint pane. Hyper V handles checkpoints by pausing writes to your primary virtual hard disk and redirecting everything into differencing disks that carry the avhdx file extension.
These differencing disks depend entirely on their parent disks. If someone moved a file manually, renamed a folder, or deleted an older snapshot in the chain, the relationship breaks. When you tell Hyper V to export, it attempts to merge or traverse that chain. If it finds a missing link or a mismatched disk signature, the entire export operation aborts with a generic read failure.
I remember spending an entire evening trying to rescue a development server, only to realize I had an abandoned checkpoint from three months prior lingering on a detached external drive. To prevent this, always inspect your guest in Hyper V Manager and review the Checkpoints section. Verify that every avhdx file and its original parent vhdx file still live in their designated storage folders. If you no longer need the snapshot, merge it back into the base disk by deleting the checkpoint cleanly inside Hyper V Manager before initiating the export.
When Alternative Approaches Make More Sense
While fixing permissions with icacls and consolidating checkpoints solves almost every native export hiccup, this workflow does have its limits.
If you are dealing with critical production environments where downtime during an export is unacceptable, relying on basic Hyper V exports is not the right move. In those situations, modern agentless backup tools or dedicated live replication utilities handle disk snapshots far more gracefully.
Similarly, if your underlying storage volume has genuine bad sectors or severe file system corruption, no amount of permission tuning will help. In that scenario, your priority should be recovering raw data files using dedicated drive recovery tools rather than attempting a high level export.
Getting past the 0x80070005 error is really just a matter of respecting how the hypervisor interacts with Windows security tokens and differencing disks. Skip the temptation to blanket your folders with loose permissions. Grab your machine ID, run the icacls grant for the virtual machine identity, ensure your checkpoint chain is fully intact, and your exports will run cleanly. It costs nothing extra, takes about two minutes of terminal work, and keeps your virtualization setup rock solid.