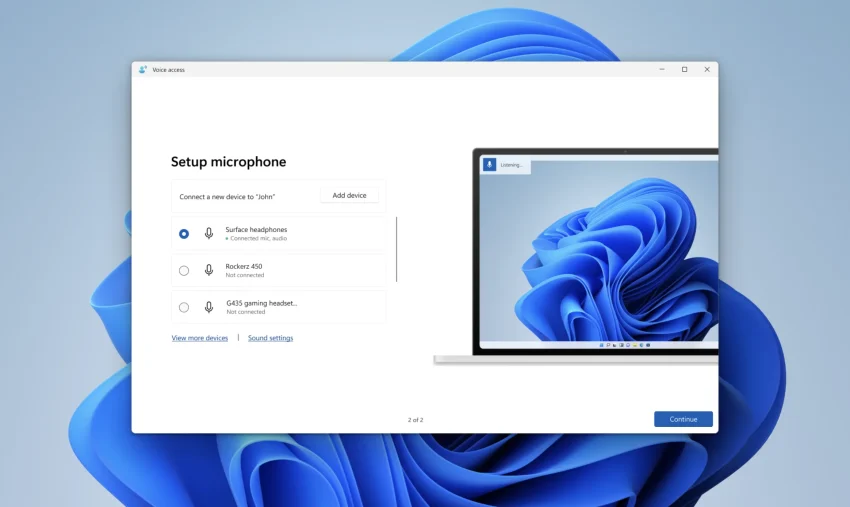
Look, we’ve all been there. When you first want to start controlling your computer with your voice, whether it’s for accessibility reasons, to give your wrists a break from coding, or just to feel like you’re living on a sci-fi spaceship, the usual advice is just to use whatever microphone is lying around. People will tell you to just plug in that cheap $15 headset you got bundled with an old phone, fire up the default dictation software, and hope for the best. I’ve tried that route. My experience? It’s an exercise in sheer frustration. The moment a dog barks, a mechanical keyboard clicks, or a roommate walks by, the software completely loses its mind, and you end up typing out the corrections by hand anyway.
Personally, I’ve found that if you really want to build a voice-control setup that doesn’t make you want to pull your hair out, you need to make a slight pivot. You don’t need to spend thousands on enterprise-grade dictation software, but you do need to invest in a decent, dedicated USB microphone (usually in the $50 to $100 range) and, more importantly, properly leverage the Voice Access and Voice Isolation features built right into Windows 11. It’s a slightly higher barrier to entry than just using a built-in laptop mic, but it is infinitely more flexible. It gives you a rock-solid foundation for voice commands that won’t leave you feeling artificially limited after your first week of use.
The Real Magic: Why Voice Isolation Changes the Game
If there is one practical feature that makes this specific setup worth the effort, it’s Voice Isolation. This isn’t just your standard, run-of-the-mill noise gate that clips the audio when things get quiet. When you set this up in Windows, the system actually creates a personalized local voice signature based on a recording you provide. It learns the specific frequencies and cadences of your voice, allowing the software to surgically extract your speech from background noise and other people talking in the room.
Why does this matter? Because a voice-controlled PC is completely useless if it only works in a silent library. Having this level of isolation makes a whole tier of projects and daily workflows actually viable. Here are a few concrete ways I use this setup, moving from basic to pretty advanced:
- Hands-free Casual Browsing: When I’m eating lunch at my desk and want to scroll through articles or skip YouTube ads without getting grease on my mouse. Voice isolation ensures the audio from the video I’m watching doesn’t trigger accidental commands.
- Drafting Long Documents with a Mechanical Keyboard: I love my clicky switches. With a good mic and isolation turned on, I can dictate entire paragraphs while simultaneously formatting or moving text around with my keyboard, and the mic completely ignores the loud clacking of the keys.
- Coding and Scripting Relief: When my carpal tunnel flares up, I use Voice Access to navigate my code editor and input boilerplate code. The isolation ensures that the ambient hum of my PC fans or my AC unit doesn’t insert random syntax errors into my work.
- Controlling OBS for Streaming/Recording: Instead of relying on a physical macro pad, I can just tell my PC to switch scenes or mute specific audio tracks. Even with game audio playing through speakers, my voice cuts through and executes the command perfectly.
- Smart Home Command Center: I tied my PC into my local home automation scripts. Now, I can just speak to my computer to dim the office lights or turn on the soldering iron switch, confident that the podcast playing in the background won’t accidentally trigger a power down.
Pushing the Limits and Troubleshooting the Quirks
Now, as your projects get more demanding, you’re going to want to know how this setup compares to the heavy hitters. A lot of professionals swear by software that costs hundreds of dollars. I’ll be honest: if you compare Windows 11 Voice Access to those massive, expensive, industry-specific programs, you might find Windows lacking some deep medical or legal vocabularies out of the box. But for 95% of hobbyists, programmers, and everyday power users, this built-in tool is vastly superior—provided you actually get it working right.
And that brings me to a crucial point. When I first tried pushing this setup, Voice Isolation flat-out stopped working. My voice was getting lost in the noise, and the PC was acting deaf. If you run into this, don’t throw your new microphone against the wall. I’ve found that there are usually a few specific culprits behind this, and fixing them saves you a massive headache down the line.
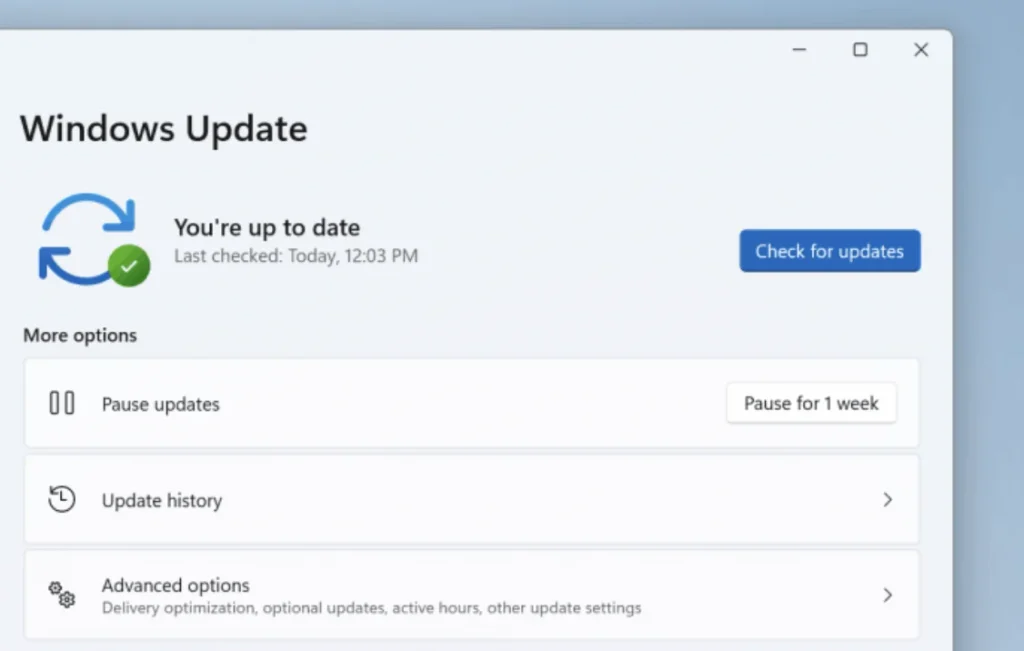
First off, the software infrastructure. Voice Isolation isn’t available on older builds. I spent an hour troubleshooting once, only to realize I needed to update Windows. The feature relies heavily on recent updates (specifically the 24H2 and 25H2 updates). You don’t need to be on an unstable Insider build anymore, but you absolutely must have a fully updated machine.
Secondly, the voice signature itself. Like I mentioned, Windows uses a sample of your voice. When I first did this, I set it up while there was construction happening outside. Garbage in, garbage out. If the isolation isn’t working, you have to go into the Voice Access settings, dig into the “Improve speech recognition” menu, and manage your Voice Isolation. Deleting that old, noisy profile and re-recording your voice in a genuinely quiet room makes a night-and-day difference. You have to speak naturally, at your normal pace. Don’t put on a fake “radio voice,” or it won’t recognize your casual commands later.
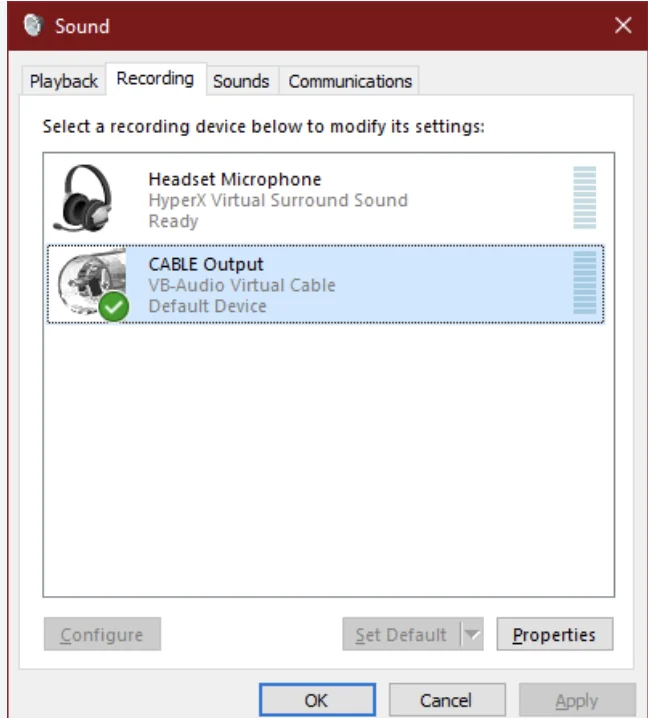
The biggest trap I fell into, however, was microphone routing. I have a webcam mic, a headset mic, and my good USB mic. Windows is notoriously bad at juggling these. There were times when my default Windows input was my good mic, but Voice Access had secretly decided to listen through the awful webcam microphone. Because the Voice Isolation was trained on the good mic, the incoming audio from the webcam didn’t match the signature, and the whole system broke down. You have to go into the Voice Access settings specifically, select your default microphone there, and ensure it matches the one you used to record your voice profile.
Finally, if you’re doing heavy, offline voice processing (which is great for privacy), the system relies on local speech language components downloaded to your drive. I once had a corrupted language pack update completely tank my voice recognition. If your mic is fine but the PC just isn’t processing the words, diving into the Time & Language settings, completely uninstalling the Speech component for your language, restarting, and reinstalling it is the ultimate fix. It resets the local processing engine without forcing you to wipe your whole OS.
When to Look Elsewhere
I want to be perfectly transparent: this setup isn’t a silver bullet for absolutely everyone. If you are someone who works in a highly specialized field—like a doctor dictating patient notes with complex Latin terminology, or a lawyer drafting highly specific legal briefs—you might actually need to bite the bullet and pay for the expensive, specialized dictation software. The dictionaries in those programs are tailor-made for that.
Additionally, if you are stuck on older hardware that simply cannot run Windows 11, or you are deeply entrenched in the Apple ecosystem, this obviously isn’t for you. Mac has its own excellent accessibility tools, and forcing a Windows-centric workflow onto hardware that doesn’t support it will just cause you grief.
For anyone else looking to get serious about voice control without taking out a second mortgage, a solid $50 to $100 USB microphone paired with a finely tuned Windows 11 Voice Access setup is the way to go. It’s a pragmatic, highly capable starting point that won’t leave you feeling artificially restricted as your technical skills and project ambitions grow. Take the time to train the Voice Isolation properly, keep your inputs organized, and enjoy the feeling of actually being heard by your machine.